Self-host Immich for photo backup: migrating off Google Photos
This guide is for anyone who wants off Google Photos and onto a photo server they control, with their entire library moved over intact. By the end you will have Immich running via Docker Compose, your full Google Photos library imported through Google Takeout with albums, dates, and locations preserved, your phone's auto-backup handed off to Immich, and your Google account safe to prune. One honest caveat before you start. For a lot of people, paying Google is fine. Self-hosting Immich earns its keep on privacy, on family per-user economics, or when you keep hitting Google's storage tiers. Android Authority puts it plainly, noting that "the costs of a VPS plus significant online storage could be higher than paying for Google One, so the only reason to go down this route would be the privacy option." If that trade lands for you, here is how to migrate off Google Photos cleanly.
Immich vs Google Photos: what you gain and what transfers
Immich is much like Google Photos, but you host the server on your own private network, as Android Authority describes it. The feature set is close enough that most of your daily habits carry over. Immich's search works with identified people, places, objects, and broad terms like beaches, cars, and food. Android Authority notes that "it's not quite as robust as Google's powerful cloud service, but it's pretty powerful for a self-hosted platform." There is a geotagged map, machine-learning-based Memories, and motion photo support. The honest gap is editing. The mobile app supports basic cropping, rotating, and a few filters, but the web app has nothing, and if you rely on Magic Editor, Android Authority's advice is to stick with Google's suite.
The other trade is that you manage the library yourself. Immich's own docs are direct about it, noting that "Immich does not handle filesystem backups for you. You have to arrange these yourself!" You should not edit the library folder on disk directly either, since all file management goes through the app.
The editing gap and the fact that you run your own backups are the two real trade-offs. Everything else in that table moves across, including your existing albums, as long as you use the right import path. The rest of this guide is how to move.
Before you start: size your storage and check requirements
The one thing that bites people mid-migration is running out of disk during a multi-hundred-gigabyte import. Size for it up front. The immich-go best-practices doc recommends you have "sufficient storage space (estimate 1.5x source size)" free before you begin. On top of the library itself, Immich's requirements note that "the generation of thumbnails and transcoded video can increase the size of the photo library by 10-20% on average," so budget for that as well.
One hard rule matters more than the rest. Postgres must live on a local SSD. Immich's docs state that "the Postgres database (DB_DATA_LOCATION) should ideally use local SSD storage, and never a network share of any kind." On Windows or WSL, it "will not work on any filesystem formatted in NTFS or ex/FAT/32," and it will not work under WSL when using a mounted host directory. Put the database on a native Linux filesystem and you avoid the most common corruption case.
Install Immich with Docker Compose
Docker Compose is the recommended install method, and you do not need Portainer, a reverse proxy, or a full server rebuild to get going. You need Docker with the Docker Compose plugin, two release files, a short edit to .env, and one command.
Note: Immich requires the command
docker compose. The similarly nameddocker-composeis deprecated and is no longer supported by Immich. If you only have the v1docker-composebinary, install the official Docker Engine with the Compose plugin first.
Create a directory to hold the two files and download them from the latest release:
mkdir ./immich-app
cd ./immich-app
wget -O docker-compose.yml https://github.com/immich-app/immich/releases/latest/download/docker-compose.yml
wget -O .env https://github.com/immich-app/immich/releases/latest/download/example.env
Now open .env and adjust a handful of values. The rest of the file does not need to change.
UPLOAD_LOCATIONis where your uploaded files are stored. Point it at a new directory on the server with enough free space (the 1.5x figure from earlier).DB_DATA_LOCATIONis where the database files live. Keep this on a local SSD, never a network share.TZsets the timezone. Uncomment it and set a TZ identifier such asEtc/UTC. This matters later because storage-template dates render in the server's local timezone.IMMICH_VERSION=v3is a rolling major tag that resolves to the newest v3.x release (v3.0.1 at the time of writing). You can pin a specific version likev2.1.0if you prefer.DB_PASSWORDis the local Postgres password. Change it to a random value using only the charactersA-Za-z0-9, with no special characters or spaces, to avoid Docker parsing issues. Thepwgenutility is handy for this.
UPLOAD_LOCATION=./library
DB_DATA_LOCATION=./postgres
TZ=Etc/UTC
IMMICH_VERSION=v3
DB_PASSWORD=a1B2c3D4e5F6g7H8
Bring the stack up:
docker compose up -d
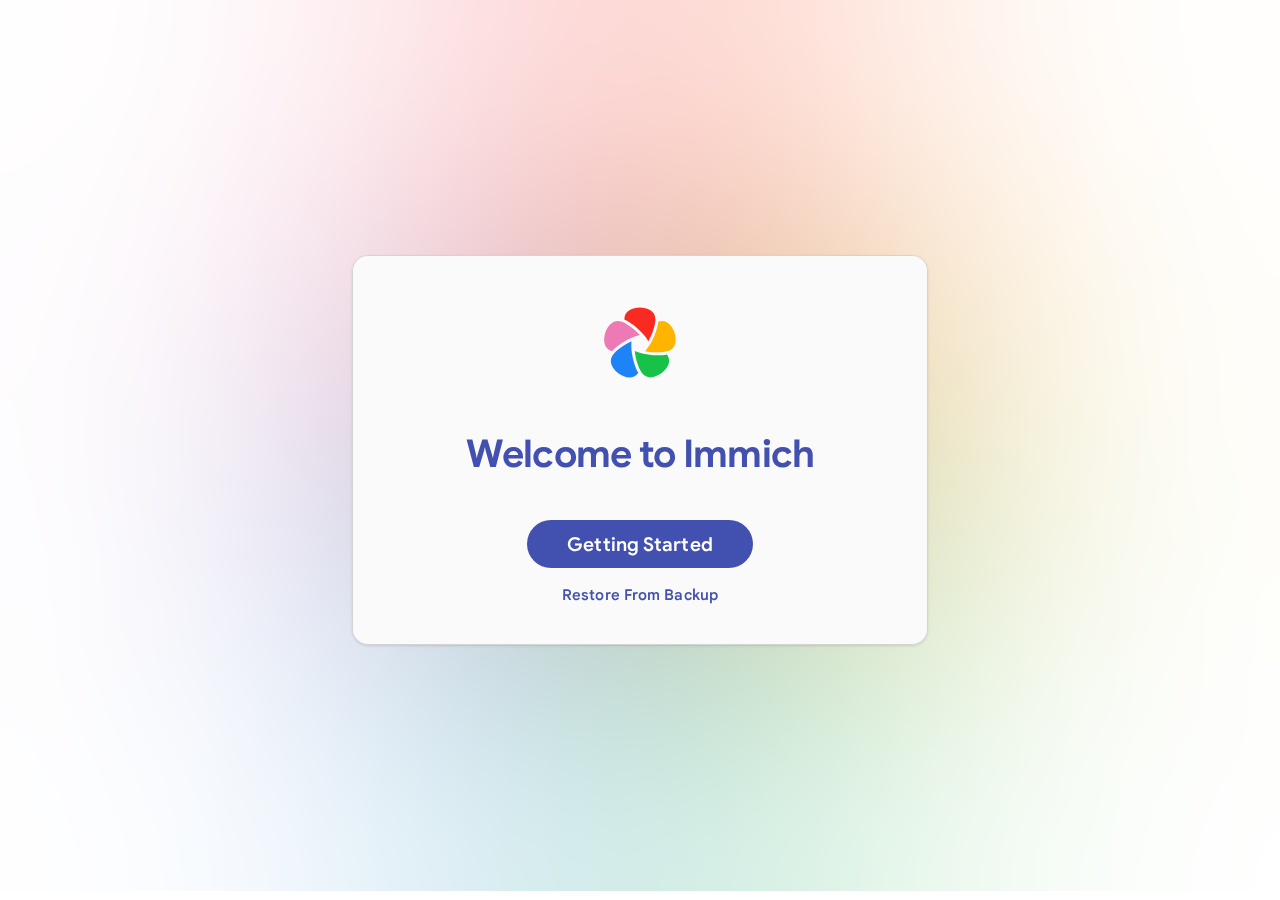
The web app then serves at http://<machine-ip-address>:2283. On a fresh install the containers reach a healthy state after a minute or two, and the landing page shows a "Welcome to Immich" card with a "Getting Started" button.
Fix the three most common install errors
These three come straight from the official install page, and they cover the failures most people hit on the first run.
unknown shorthand flag: 'd' in -dorpermission deniedmeans you are probably running the wrong Docker version. Immich's docs note this "happens, for example, with the docker.io package in Ubuntu 22.04.3 LTS." Install the official Docker Engine for your distribution, which replaces the distro's Docker packages with Docker's own.'name' does not match any of the regexes: '^x-'means you ran the deprecateddocker-compose(v1). Usedocker compose(v2) instead.can't set healthcheck.start_interval as feature require Docker Engine v25 or latermeans your Docker Engine predates v25. Comment out thestart_intervalline in thedatabasesection ofdocker-compose.yml.
First-run setup: admin user, storage template, port 2283
Open http://<machine-ip-address>:2283 and click Getting Started. As Immich's docs put it, "the first user to register will be the admin user. The admin user will be able to add other users to the application." Follow the prompts to register and log in.
If the whole household is moving, create the other accounts now. On the Administration > Users page, click Create user for each family member. Immich is as much about managing users as it is about organizing photos, and doing this before the import means everyone has an account to attach an API key to.
Set the Storage Template before you import so the library lands organized on disk. In Administration > Settings > Storage Template, the default template is Year/Year-Month-Day/Filename.Extension. Date and time variables in the template render in the server's local timezone, which is why the TZ value in .env matters. The template engine has been off by default since version 1.92.0, so the UPLOAD_LOCATION/library folder is not used until you enable it. If you turn it on or change the template after files already exist, run the Storage Template Migration job to apply the change to the existing library.
The core migration: Google Takeout to Immich with immich-go
This is the part most guides skip in a sentence, and it is the whole point of the exercise. The tool division is worth stating plainly, because it saves you from importing your library the wrong way. The official Immich CLI does not do Google Takeout. Immich's own CLI docs say so directly. "If you are looking to import your Google Photos takeout, we recommend this community maintained tool immich-go." The official @immich/cli is for uploading a plain local folder (immich upload --album --recursive directory/), and it is fine for that. It is not built to reassemble the metadata that Takeout scatters across sidecar JSON files.
immich-go is built for exactly that. Its from-google-photos command "intelligently matches photos with their JSON metadata to preserve albums, descriptions, and locations." It is a single binary with "no NodeJS or Docker required," it is marked "Compatible with Immich V2 and V3," and it "successfully handles 100,000+ photos." It is also community-maintained by simulot and its own README carries a warning worth respecting. It is "an early version, not yet extensively tested," and you should "keep a backup copy of your files for safety." The next four sections walk the migration end to end.
Request your Google Takeout export as 50 GB ZIP files
Head to takeout.google.com and log in. Google auto-selects every product that holds your data, so the first step is to deselect everything except Photos. Then set the export options:
- Export type: One-time archive. This creates a single archive of your selected data, as opposed to scheduled exports that repeat every two months.
- File type: Zip. Zip files open on almost any computer, whereas tgz "may need additional software to open on Windows." Pick one format and stick with it, because you should not mix ZIP and TGZ in the same import later.
- Archive size: 50 GB. Google's help notes that to "decrease the possibility that your archive will be split, you can select the 50GB size limit." The immich-go best-practices doc agrees: "Select maximum size (50GB) to minimize parts."
Large libraries are still split into multiple files named takeout-001.zip, takeout-002.zip, and so on. Keep every part. The best-practices doc lists incomplete downloads as a common pitfall and tells you to "verify all takeout-001.zip, takeout-002.zip, etc. files are present."
Warning: Requesting a Takeout does not delete anything from Google. As Google's help page states at the top, "if you download your Google data, it doesn't delete it from Google's servers." Deletion is a separate step at the very end of this guide, and only after you have verified the import and backed up Immich.
Two more facts to plan around. Your archive "expires in about 7 days," and Google notes "we only allow each archive to be downloaded 5 times; after that, please request another archive." Most people get the download link the same day they request it, though a large account can take longer.
What Google Takeout does to your metadata (and why immich-go)
Here is the gotcha that makes plain drag-and-drop lose your albums. When you download from Takeout, the photo's own EXIF timestamp stays embedded in the file, but the extra context does not. Google's help explains what happens. "Based on the time the photo or video is downloaded, your operating system can assign a new timestamp to the file itself," while "any additional metadata that isn't from the original file, like comments within Google Photos, are downloaded to a secondary JSON file." Album membership, descriptions, and similar context all live in that per-item sidecar JSON, and your OS may re-stamp the file's filesystem date on download. Copy the photos across by hand, or feed them to the plain CLI, and you keep the pixels but throw away the organization.
immich-go's from-google-photos reads those sidecar files and puts the context back. It matches each photo to its JSON to preserve albums, descriptions, and locations, and it "automatically creates albums and tags on the server to match your source organization." It also groups "related images, like RAW+JPEG pairs or photo bursts, into stacks."
One thing to verify rather than assume. Burst photos and RAW+JPEG pairs are documented as stacked, but motion-photo and live-photo pairing in the Takeout to immich-go path is less clearly documented. Immich supports motion photos as a feature in general, which is a separate matter from how a Takeout import pairs them. After your import finishes, open a few of your motion or live photos specifically and confirm they came across the way you expect.
Install immich-go and create an API key
immich-go is a single pre-built binary, so there is no Node or Docker to set up. Its docs say plainly, "no prerequisites needed - just download and run!" Visit the releases page, grab the archive for your platform (Linux is immich-go_Linux_x86_64.tar.gz, with Windows .zip and macOS/FreeBSD .tar.gz also available), extract it, and optionally move it onto your PATH:
# Linux/macOS/FreeBSD
tar -xzf immich-go*.tar.gz
sudo mv immich-go /usr/local/bin/
immich-go --version
The version check should report v0.32.0 or later. (Termux on Android is the one exception, since the pre-built ARM64 binaries do not work there and you have to build from source.)
Next, create an API key. In the Immich web UI, go to Account settings > API Keys > New API Key. Create one per user account you plan to migrate, each with these permissions:
asset.read,asset.statistics,asset.update,asset.upload,asset.copy,asset.delete,asset.downloadalbum.create,album.read,albumAsset.createserver.about,stack.create,tag.asset,tag.create,user.read
If you plan to use the --pause-immich-jobs flag during a large import, that key needs to be admin-linked and include job.create and job.read on top of the list above. One change to note if you are following older tutorials is that since v0.32.0 the asset.replace permission is no longer needed. The docs confirm the underlying method "has been removed," and "if your API key includes it, it will be ignored by the server."
Run the import with flags tuned to your library size
The basic command points immich-go at your server, your API key, and all the Takeout parts at once:
immich-go upload from-google-photos --server=http://your-ip:2283 --api-key=your-api-key /path/to/takeout-*.zip
The takeout-*.zip glob picks up every split part in one run, so you do not have to feed them in one at a time. Before you commit the whole library, run a small test batch with --dry-run --log-level=DEBUG against a subset so you can confirm upload quality and metadata preservation on a handful of photos first.
Once you are confident, tune the flags to the size of your collection. These profiles come straight from the immich-go best-practices doc.
For a large library the command looks like this:
immich-go upload from-google-photos \
  --server=http://localhost:2283 \
  --api-key=your-api-key \
  --concurrent-tasks=4 \
  --client-timeout=60m \
  --pause-immich-jobs=true \
  --on-errors=continue \
  --session-tag \
  /path/to/takeout-*.zip
Pausing Immich's background jobs during the upload keeps the server from thumbnailing while it is still ingesting, which speeds the import. The run is also safe to repeat. immich-go "detects existing files and skips duplicates," so re-running the same command never doubles anything up.
Expect the machine's first machine-learning pass to run for a while after the upload finishes. Android Authority describes it: "Importing a new library is also very slow on my N100 machine, taking many hours to generate thumbnails and collect face data, which is to be expected in an energy-efficient NAS setup. Desktop-class PCs will be much faster." That work is normal and separate from the upload itself.
Verify the import: counts, dates, locations, and albums
Do not delete anything from Google until you have checked the import properly. The immich-go best-practices doc lays out a four-step validation, and it is worth treating each one as a checklist item:
- Count verification. Compare source and destination counts. Immich is packed with library metrics that show your total assets, the photo-to-video breakdown, and storage used, so you can line up the destination count against what Google reported.
- Spot checks. Open random samples and confirm the photos themselves look right.
- Metadata check. Ensure dates, locations, and albums came across. Open a handful of photos and confirm the capture date, the map location, and album membership all survived.
- Organization review. Confirm the auto-created albums and tags match how Google had things organized.
While you are in the metadata step, spot-check a few motion or live photos specifically, since their pairing behavior is the one part of the import that is less certain.
Once validation passes, archive the original Takeout ZIPs somewhere safe before you touch anything on Google:
tar -czf google-photos-backup.tar.gz takeout-*.zip
mv google-photos-backup.tar.gz /secure-archive/
Resume an import that failed halfway
Long imports get interrupted, and immich-go is built to pick up where it stopped. It is "safe to restart," so after a network drop you re-run the exact same command and duplicates are skipped. Enabling --session-tag lets you track what a given run imported, and reviewing the log files tells you where it stopped.
If it finishes but many photos are missing, work through three checks. First, confirm every Takeout part is present with ls -la takeout-*.zip. Second, retry with the unmatched-files flag:
immich-go upload from-google-photos --include-unmatched --server=... --api-key=... /path/to/takeout-*.zip
Third, if the data itself looks incomplete, request a fresh Takeout for the missing periods. Some Google Takeouts come back incomplete, which is a known thing that happens occasionally, so a re-request is a normal fix rather than a sign something is broken.
For deeper diagnostics, add verbose logging and an API trace to your command:
--log-level=DEBUG \
--log-file=/tmp/immich-go-debug.log \
--api-trace
Hand off ongoing backup to the Immich mobile app
With the historical library in, replace Google Photos auto-backup with Immich's. Install the app from Google Play (app.alextran.immich), the Apple App Store (id1613945652), F-Droid, or the apk on GitHub Releases. Immich can also give you an Obtainium config link from the Utilities page of your server.
Log in with the server endpoint URL at http://<machine-ip-address>:2283, or your remote hostname if you have set one up. Then enable backup:
- Tap the cloud icon in the top-right corner to open the backup screen.
- Select which album or albums you want to back up to the server.
- Scroll to the bottom and press Enable Backup to start uploading the assets in the selected albums.
Android Authority notes the app "makes backing up your phone's photos as seamless as ever, aping the familiar backup folder configuration and data or Wi-Fi toggles," so you can restrict it to Wi-Fi only or charging only if you want. This is the moment your Google Photos auto-backup becomes redundant.
Back up Immich itself (do this before you delete anything from Google)
Immich does not back itself up. Its docs are blunt, noting that "the instructions on this page show you how to prepare your Immich instance to be backed up, and which files to take a backup of. You still need to take care of using an actual backup tool to make a backup yourself." Two things must be backed up or a restore will fail.
The originals are the critical piece. Immich recommends backing up the entire contents of UPLOAD_LOCATION, but only the original content is critical, which lives in three folders:
UPLOAD_LOCATION/libraryUPLOAD_LOCATION/uploadUPLOAD_LOCATION/profile
Thumbnails and encoded video are regenerable, so you can skip them and just rerun the transcoding and thumbnail jobs after a restore. On a running stack these sit alongside backups, encoded-video, and thumbs under UPLOAD_LOCATION.
The database is the second piece. Immich "automatically creates database backups for disaster-recovery purposes," stored in UPLOAD_LOCATION/backups and managed under Administration > Settings > Backup, which defaults to keeping the last 14 and creating one daily at 2:00 AM. The important caveat is what those backups contain. Per the docs, "database backups do not contain photos or videos, only metadata. They must be used together with a copy of the files in UPLOAD_LOCATION." Backing up only the database gives you false confidence, because you would restore metadata that points at photos you no longer have.
That is why the official advice is a 3-2-1 strategy of at least two local copies and one offsite copy in cold storage. When you take the backup, the cleanest approach is to stop the immich-server container so nothing changes mid-copy. If you cannot stop it, back up the database first and the filesystem second, so the worst case is files on disk the database does not yet know about, rather than the reverse.
Delete your photos from Google (the exit step)
This is the step that makes the migration real, and sequencing matters. Only delete from Google after the import verified clean and you have a working Immich backup. Remember that downloading your Takeout did not remove anything. As Google's help states, "if you download your Google data, it doesn't delete it from Google's servers."
In the spirit of 3-2-1, keep Google Photos around as a temporary second copy for a grace period before you bulk-delete. Once you are confident Immich holds everything and your backup is solid, remove the photos from Google. For the exact deletion steps, follow Google's own account and activity deletion help rather than any third-party click path, since Google's interface is the source of truth for that action.
Troubleshooting the migration and install
Wrap-up and where to go next
You installed Immich lean with Docker Compose, moved your whole Google Photos library across with albums, dates, and GPS intact using immich-go's from-google-photos, verified the counts and metadata before trusting it, handed ongoing phone backup to the Immich app, set up a real backup of both the originals and the database, and only then pruned Google. That order, verify then back up then delete, is what keeps the migration safe.
For more depth, the official Immich docs and the quick-start overview cover one-click installs for Synology, TrueNAS, Unraid, DigitalOcean, and Vultr if you would rather not run raw Compose. The immich-go best-practices guide and its repo go further on migration edge cases, awesome-immich collects community tooling, and the roadmap tracks what is coming. As for whether the move is worth it, Android Authority's read is a fair one. Immich "can probably do 90% of what I like about Google Photos; it's just missing the editing capabilities that I can still use on my phone anyway." If privacy, family economics, or Google's storage tiers are pushing you, self-hosting earns its keep. If none of those apply, staying on Google Photos is a perfectly reasonable choice.