Lottie is the JSON animation format used by Airbnb, Duolingo, and most major apps for cross-platform motion graphics. Until recently, creating Lottie files required After Effects or a design tool. Claude Code can now generate valid Bodymovin JSON directly, with no design tool needed. This article covers three approaches: the diffusionstudio skill harness (easiest), the Lottie Creator MCP (editor-integrated), and the 21st SDK agent pattern (build your own generator). All produce standard .lottie.json files that run in any Lottie-compatible player.
Quick comparison: three ways to generate Lottie with Claude Code
Generate Lottie animations with the diffusionstudio skill
The diffusionstudio skill is an open-source harness for generating production-ready Lottie animations with Claude Code, Codex, or any coding agent that supports skills. Install the skill, start the local preview player, then prompt Claude Code to write public/lottie.json. Vite hot-reloads on every save.
Install the skill and start the preview server
Run three commands to get from zero to a live preview:
npx skills add diffusionstudio/lottie
npx degit diffusionstudio/lottie my-animation
cd my-animation && npm install && npm run dev
The npx skills add step registers the skill with Claude Code. npx degit scaffolds the player project locally. npm install runs a postinstall script that copies the CanvasKit WASM binary into /public. npm run dev starts a Vite dev server with a Skottie renderer. Open the dev server URL in your browser, then switch to Claude Code and start prompting.
Ask Claude Code to generate an animation
Once the preview server is running, ask Claude Code to generate public/lottie.json. The README's example prompt shows the level of specificity that works well:
"Create a Lottie animation from the SVG path in https://github.com/JaceThings/SF-Hello/blob/main/SF-Hello/SVG/hello-en.svg. Reveal the path with an animation that follows the natural path direction. Apply a premium apple themed gradient to the path. Use ease-in-out timing, a transparent background, and preserve the original SVG geometry."
For a simpler first animation, "Generate a loading spinner, 120 frames at 60fps, 512x512, with two color slots" is enough to get started. Claude writes the file, Vite hot-reloads, and the animation appears immediately in the browser.
To inspect a specific frame without scrubbing, add ?frame=60&paused=1 to the dev server URL. ?paused=1 starts at frame 0, paused. The canvas element has data-testid="lottie-canvas" if you need to target it in tests.
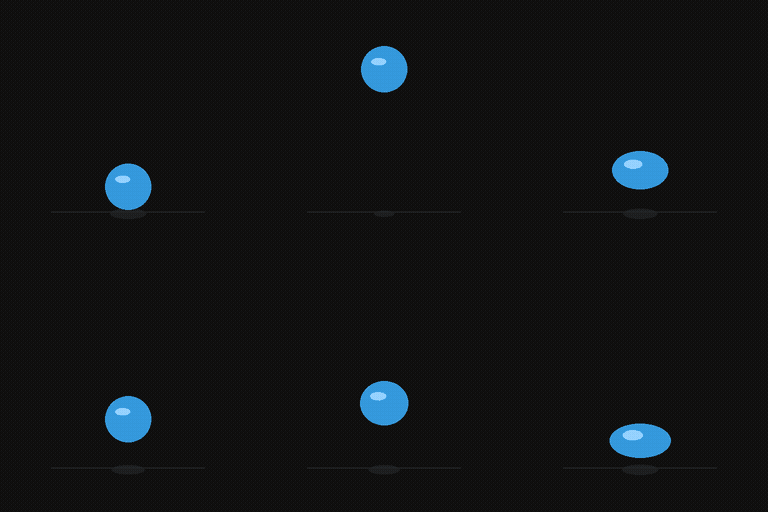
Three examples generated with Claude Code using the diffusionstudio skill:


The Skottie group rule you need to know
The diffusionstudio player uses Skia's Skottie module (canvaskit-wasm), not the JavaScript lottie-web runtime. Skottie is stricter. The most important difference is that every shape must be inside a "ty": "gr" group. Flat shape lists render blank. Claude Code handles this automatically when using the skill, but if you edit JSON manually or hit a blank preview, this is the first thing to check.
Two other format details trip people up: colors are [r, g, b, a] in 0–1 space (not 0–255), and shape layers use "ty": 4. Both are standard Bodymovin 5.7.0, but easy to get wrong when editing JSON by hand.
Add live controls with the slots system
Animations can expose editable properties via Skottie's slot feature. Add a "slots" object at the top level of the JSON and reference slots with "sid" on any property. A companion file at public/controls.json provides labels, min/max values, and step sizes. The preview player renders a live properties panel automatically: scalar slots become sliders, color slots become color pickers, and text slots become text inputs.
Every animation should include a background-color slot. The player doesn't paint its own background, so without one the canvas is transparent and the animation can be hard to evaluate.
Edit Lottie animations with the Lottie Creator MCP
The Lottie Creator MCP connects Claude Code (or any MCP-compatible client) to a live Creator session, so the AI reads and edits the file you have open. Rather than writing raw JSON, you work inside the Creator editor and let the AI drive it.
Add the MCP to your Claude Code config
Add this block to your MCP config file:
{
  "mcpServers": {
    "lottiefiles-creator": {
      "command": "npx",
      "args": ["-y", "@lottiefiles/creator-mcp@latest"]
    }
  }
}
No auth, no API keys required. The @latest tag keeps you current without pinning a version. Config file location depends on your client: claude_desktop_config.json for Claude Desktop, settings.json for VS Code, or the MCP settings panel in Cursor. You need Node.js 18+ and a LottieFiles Creator tab open at creator.lottiefiles.com.
Enable the bridge in Creator and add the motion design skill
In Creator, go to Settings > MCP Settings > Enable MCP. You should see a toast: "Local MCP bridge connected." Once connected, your AI can read the current scene, add layers, set keyframes, and export Lottie JSON through the full Creator API.
Then install the motion design skill:
npx skills add LottieFiles/motion-design-skill
The MCP gives the AI the tools, and the motion design skill gives it the judgment to use them well. It includes easing curves, timing tables, Disney's 12 principles adapted for UI, and choreography rules. Without it, you get stiff, mechanical motion. The skill works with 40+ agents including Claude Code, Cursor, Codex, and Copilot.
Tips for getting good results from the Creator MCP
Four things that make a real difference in output quality:
- Import your own SVG first, then animate it. AI is shaky at drawing shapes from scratch but performs well when animating shapes you already have.
- Name your layers before prompting. Use descriptive names like
left_arm,bg_circle,text_headline. The AI reads layer names, and names likeShape 1andGroup 4force it to guess. - Go scene by scene. "Build me a full onboarding animation" produces inconsistent results. "Create the entrance scene, 3 layers, stagger them 60ms apart with ease-out" is a spec the AI can follow.
- Be specific about feel. "Smooth fade" is vague. "400ms fade-in with ease-out" is a spec.
Build a Lottie generator with the 21st SDK agent pattern
The 21st.dev template shows how to wrap Claude in a single render_lottie tool call. It deploys as a Next.js app with a live preview and scrubbable timeline. The key insight is that the system prompt is 40% Lottie cheatsheet.
Why the system prompt matters more than the model
Bodymovin is a large spec and Claude's default knowledge of it is incomplete. Hand it the schema rules inline and it writes valid JSON first-shot. No embeddings, no RAG, no vector DB are needed. The important rules to include:
ty: 4for shape layerskstransforms witha: 0(static value ink) ora: 1(keyframed,kis array of{t, s, e})- Colors as
[r, g, b, a]in 0–1 space, not 0–255 - Bezier paths:
{i: [...], o: [...], v: [...], c: boolean} - Fill:
{ty: "fl", c: {a: 0, k: [r,g,b,a]}, o: {a: 0, k: 100}} - Stroke:
{ty: "st", c: ..., o: ..., w: {a: 0, k: px}} ip/opdefine when a layer is in/out (in frames)
A well-written system prompt and zod validation on the way out produces Bodymovin v5.7+ compatible output, first-shot, most of the time.
The agent template
import { agent, tool } from "@21st-sdk/agent"
import { z } from "zod"

const lottieSchema = z.object({
  v: z.string(),
  ip: z.number(),
  op: z.number(),
  w: z.number(),
  h: z.number(),
  fr: z.number(),
  layers: z.array(z.any()),
  assets: z.array(z.any()).optional(),
}).passthrough()

export default agent({
  model: "claude-sonnet-4-6",
  runtime: "claude-code",
  permissionMode: "bypassPermissions",
  maxTurns: 10,

  systemPrompt: `You generate valid Bodymovin JSON (Lottie v5.7+) for short animations.

SCHEMA RULES:
- Shape layers use ty: 4, with ks (transform) containing a, p, s, r, o.
- Each transform property has a: 0 (static value in k) or a: 1 (keyframed, k is array of {t, s, e}).
- Colors are [r, g, b, a] in 0..1, not 0..255.
- Bezier paths: {i: [...], o: [...], v: [...], c: boolean}.
- Fill: {ty: "fl", c: {a: 0, k: [r,g,b,a]}, o: {a: 0, k: 100}}.
- Stroke: {ty: "st", c: ..., o: ..., w: {a: 0, k: px}}.
- ip / op define when a layer is in/out (frames).
- Top-level: v (version), ip (0), op (total frames), w, h, fr (framerate), layers [].

OUTPUT:
Call render_lottie with a complete JSON that plays standalone.`,

  tools: {
    render_lottie: tool({
      description: "Render the generated Lottie animation in the preview.",
      inputSchema: z.object({
        animation: lottieSchema,
        name: z.string(),
        description: z.string(),
      }),
      execute: async ({ animation, name, description }) => {
        return {
          content: [{ type: "text", text: JSON.stringify({ animation, name, description }) }],
        }
      },
    }),
  },
})
The architecture uses one tool (render_lottie), zod validation on the output, and schema rules inline in the system prompt. The app wraps this in Next.js 16 + Tailwind + lottie-react for playback, with a custom canvas timeline for scrub interaction.
Run it locally in 60 seconds
npx degit 21st-dev/21st-sdk-examples/lottie-generator my-lottie-agent
cd my-lottie-agent
npm install
npx @21st-sdk/cli deploy
npm run dev
No database, no auth, state in localStorage. You type a prompt, the agent writes valid Bodymovin JSON, and you get a live preview with a scrubbable timeline, hover-scrub, copy JSON, and one-click download.
Use generated animations in production
The exported lottie.json works in any Lottie-compatible player. Here are the embed snippets for the most common targets:
Embed in a React app with dotlottie-react
npm install @lottiefiles/dotlottie-react
import React from 'react';
import { DotLottieReact } from '@lottiefiles/dotlottie-react';

const App = () => {
  return (
    <DotLottieReact
      src="path/to/animation.lottie"
      loop
      autoplay
    />
  );
};
For production, use the .lottie extension (compressed dotLottie format) rather than .json. Both work, but .lottie is smaller and the recommended format for new projects.
Embed in vanilla HTML
<script src="https://unpkg.com/lottie-web/build/player/lottie.min.js"></script>
<div id="anim"></div>
<script>
  lottie.loadAnimation({
    container: document.getElementById("anim"),
    renderer: "svg",
    loop: true,
    autoplay: true,
    path: "/animations/my-animation.json"
  });
</script>
Prompt writing tips for better animations
Five tips from the diffusionstudio README:
- Ground the model. Provide SVGs, real-world data, or screenshots whenever possible. Results are significantly better when the animation is based on concrete assets.
- Use motion design terminology. Describe timing and movement with terms like ease-in, ease-out, and ease-in-out.
- Think like a camera operator. Include pushes, pans, and zooms in your prompt. The agent can simulate camera movement through group transforms.
- Request the controls you need. By default, outputs usually only expose a background color control. Explicitly ask for color sliders or opacity controls if you want them.
- Specify FPS and duration. Include the desired FPS and total frame count in the prompt if your use case requires a specific frame rate or length.
Limitations to know before you start
- Skottie strictness. The diffusionstudio player uses Skia's Skottie module, which is stricter than lottie-web. Some lottie-web features such as expressions and text animators won't render in the local preview. Test in lottie-web if you need those features.
- Agent-only workflow. The diffusionstudio skill requires Claude Code or a compatible coding agent. There is no standalone CLI or web tool.
- No npm package. You can't
importthe skill as a library. It's a harness that scaffolds a project, not a module. - Creator MCP requires an open tab. If you close the LottieFiles Creator tab, the bridge drops. Keep the tab open for the duration of your session.
- 21st SDK requires deployment. The agent pattern needs to be deployed via
npx @21st-sdk/cli deploybefore it runs. It's not a local-only script.